
")
Difficulty level: Minor
Total Time Required: 1 1/2 Hours
If you are currently searching to upgrade your car head unit, RNS-510 is one of the top solutions for you and the retrofit is almost plug-n-play.
Looking at ebay we found several types of RNS 510 with different hardware A, B, C and capabilities. We also found that the top C version had two other subproductions, the only difference being the screen. TFT-LCD or LED. In order to separate the RNS510 with the LED display, the top right button has been changed to a star.
Due to a significant difference in price, and small differences in terms of features in the star version, I preferred the version with the TFT-LCD screen.
I ordered the RNS-510 from ebay and came to my door in 9 days.
Renewal 12/2012: The latest hardware version of the RNS-510 is J. It features a faster processor, LED display, larger disk, improved radio tuner and of course all the functions of previous releases.
UNBOXING
The package contained the following items:
1. RNS 510:

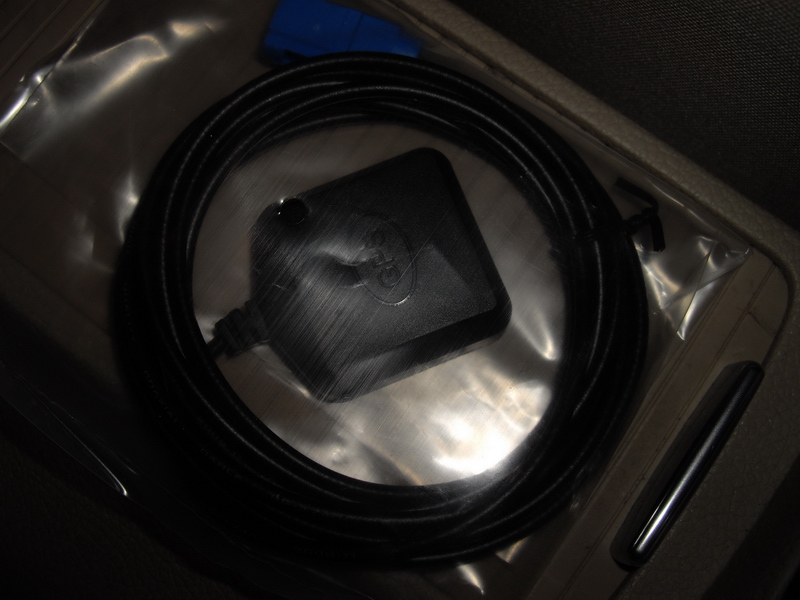
2. GPS antenna:
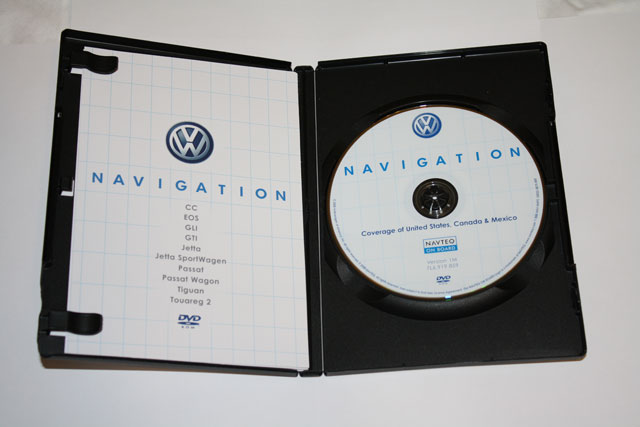
3. V7-2010 Maps DVD
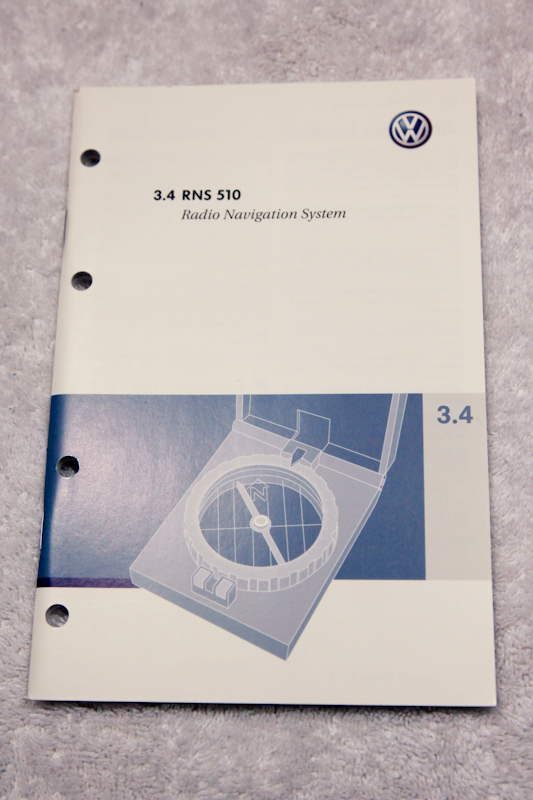
4. RNS-510 Manual
5. The converter cable (it is only needed when upgrading from a 2nd generation system to a 3d generation system)

NECESSARY TOOLS
It does not require many tools to place the RNS510 as it is a plug-n-play device. You will need the following:
• Trim Removers
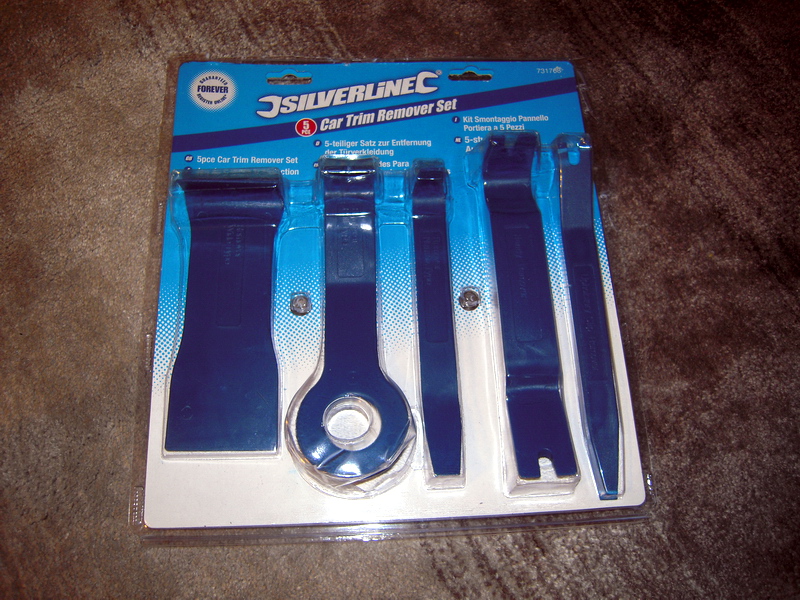
To remove the plastic decoration without causing scratches. You can find them on ebay with a maximum of 20 euros per set. We have read that for the same job some have successfully used a phonecard.
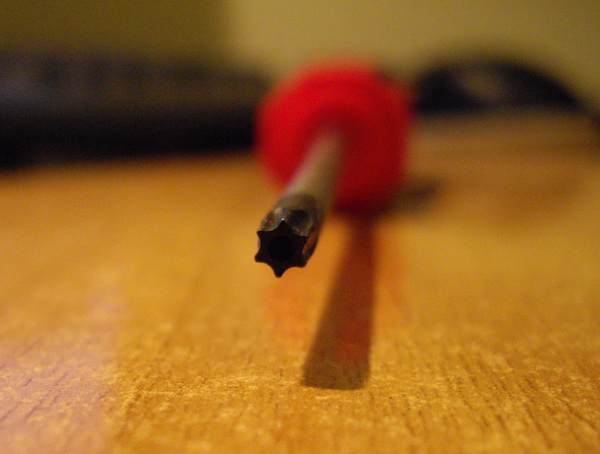
• TORX size T20.
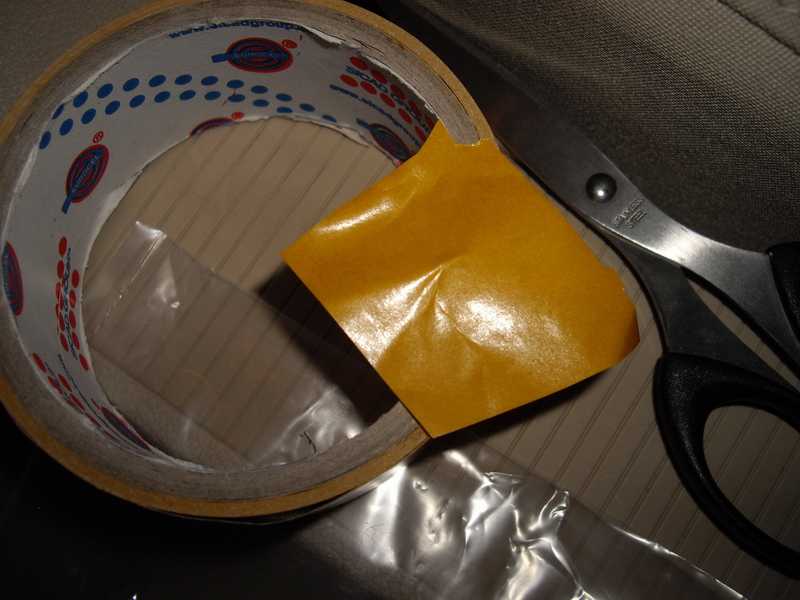
• Double sided duct tape.
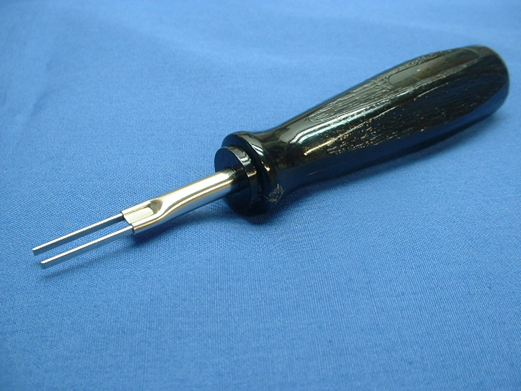
• (applies only to 2nd generation systems) A special tool for removing the electric pins from the black socket on the back of the audio system.
• (applies only to 2nd generation systems) The vag-com cable from the ross-tech company to reprogram the car's brain. You can obtain the cable from a third party. It also needs a portable PC.

• (applies only to 2nd generation systems) It is necessary to buy a new Canbus system if the RNS-510 firmware is later than version 1100.
OLD RCD REMOVAL
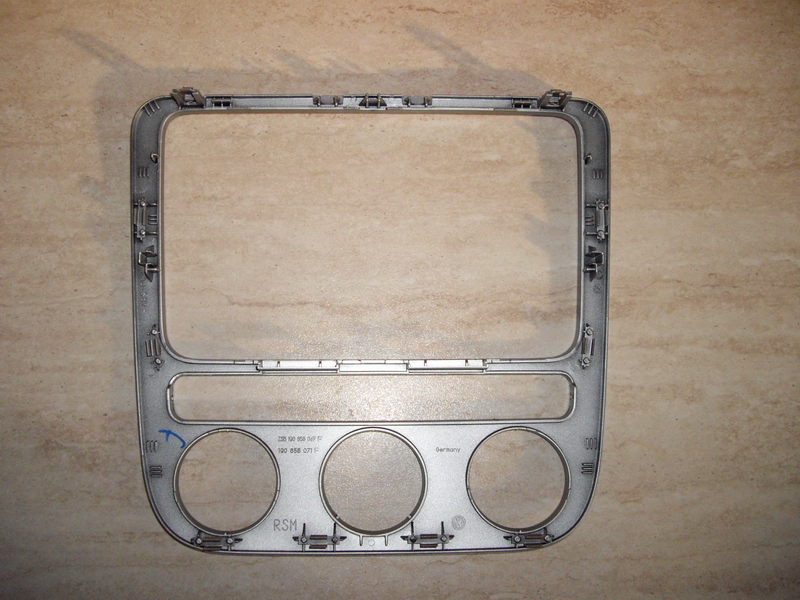
Using trim removers, remove the plastic decorative box starting from above (marked in red). Continue removing the upper side and slowly down to the bottom. See the following illustrations carefully to understand where the mounting clips are holding the frame. Take care not to break them!
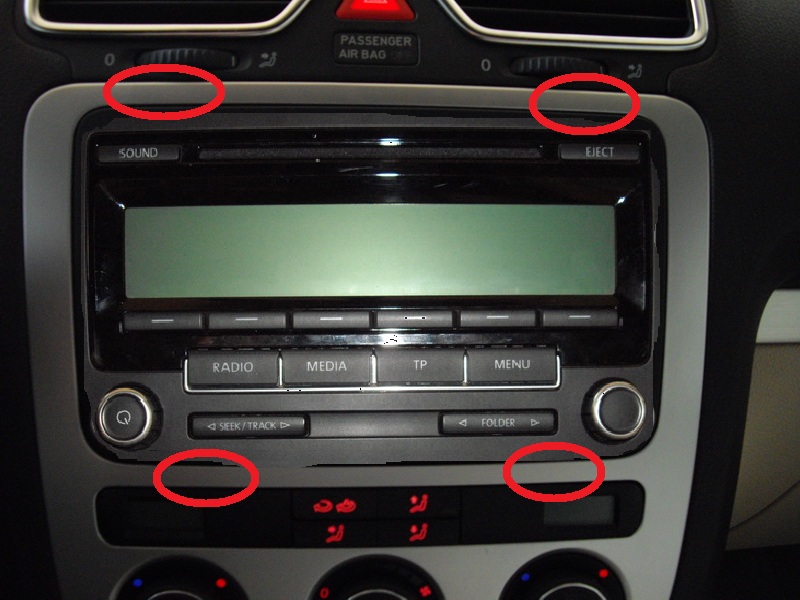
There are 4 special screws that keep together the RCD.
Remove them with the Torx T20 screwdriver.

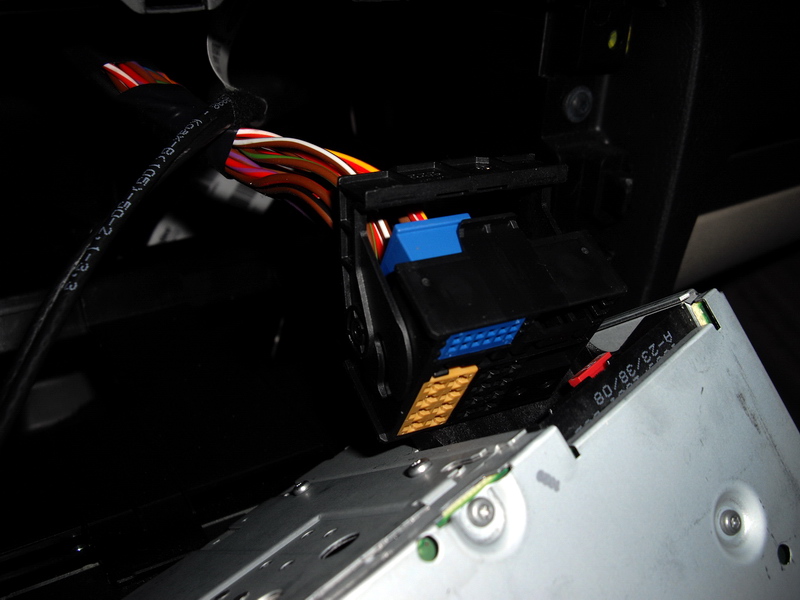
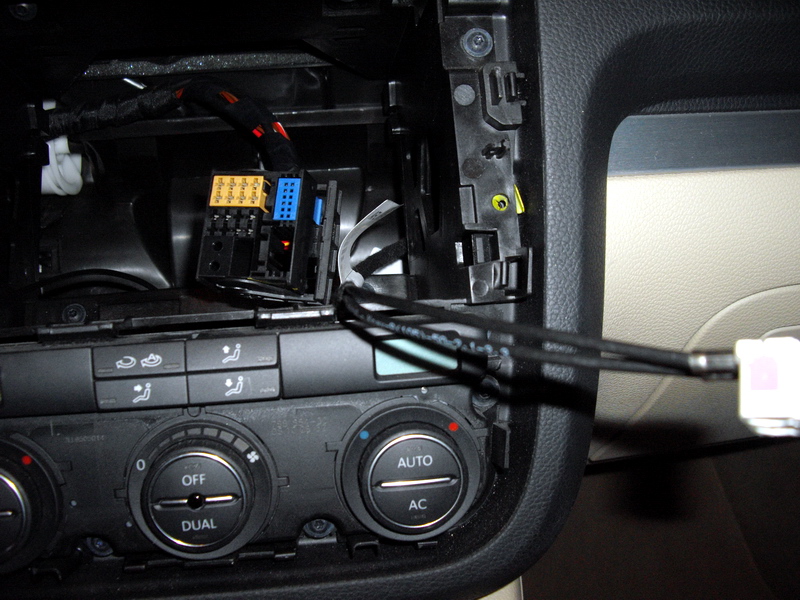
Take out the RCD and disconnect its 2 wires. The cable with the black plug has a clip that you need to lift so you can remove it.
Now, depending on the version of your old audio system, you have to go to the next step that is connecting the RNS 510.
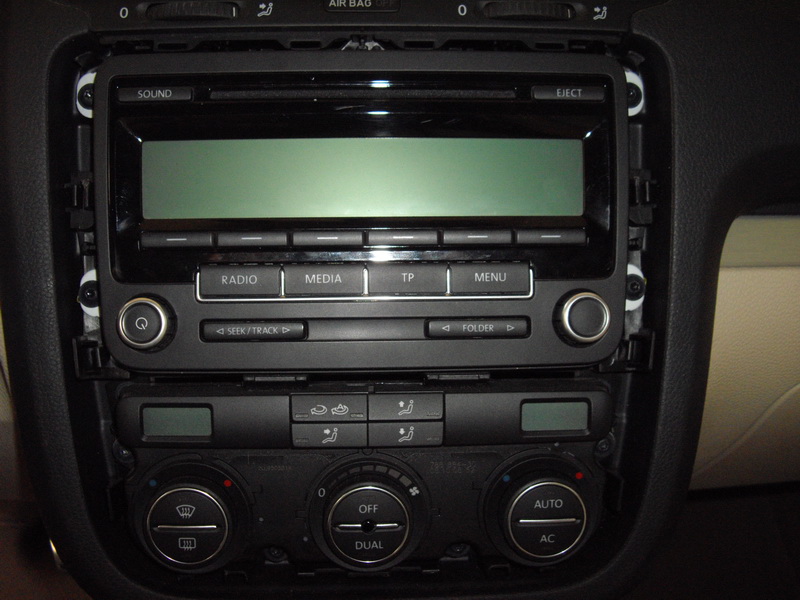
• If you have a 3rd generation audio system, as in my case, then it is a pleasure to enjoy. It remains to snap into the RNS-510 and you are ready! The RCD-210, RCD-310, RCD-510 and RNS-310 are 3rd generation audio systems. Proceed to the next page.
• If you have a 2nd generation audio system, then you have to make several conversions. The RCD-300, RCD-500 and MFD2 are 2nd-generation audio systems. Go to page 5.
CONNECTING RNS-510
(CARS EQUIPED WITH 3RD GENERATION SYSTEMS)
In case your old audio system has the same wiring as the RNS-510, just stay connected and mount the GPS antenna!
1. Attach the double-sided adhesive tape to the GPS antenna.
2. Place the antenna in the space above the audio system, you will feel that there is a large gap there (under the air ducts). Make sure the GPS cable is hidden to the right so there is no problem after putting in the RNS. Alternatively, the GPS antenna can be inserted into the A-Pillar or on the dashboard. The latter solution is the most efficient but at the same time more unattractive as the antenna looks and is difficult to install. For instructions on removing plastic pieces, you can see the bluetooth installation presentation.
3. Connect the cables to the RNS-510 (make sure they snap correctly).
4. Push the RNS inwards.
5. Screw the 4 screws with the Torx screwdriver.
6. Place the plastic cover.
7. That's it!
CONNECTING RNS-510
(CARS EQUIPED WITH 3RD GENERATION SYSTEMS)
If your old audio system does not have the same wiring as the RNS-510 (2nd generation) then you have to make several changes before and after installation for proper RNS operation.
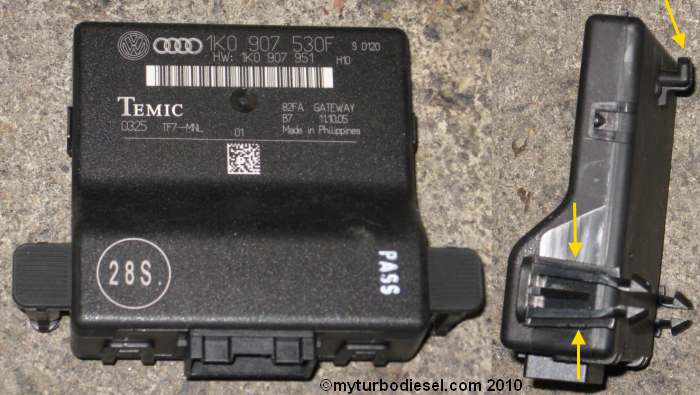
CAN BUS Upgrade
If you are installing an RNS 510 with software up to 1200 or any other 3rd generation audio system, then you need to upgrade the CAN Bus to L or better. You can find out what version you have using the VCDs or looking at your car's CAN Bus.
Click here to read more about the upgradr
Click here to read about the can bus retrofit
Change cables for CD Changer and Aux In
CD changer audio sound quality problems after changing head unit
Auxiliary input audio sound quality problems after changing head unit
GPS ANTENNA CONNECTION
1. Follow the instructions for removing the plastic pieces to pass the antenna cable. Please read here or here for the right way to do so.
2. Attach the double-sided adhesive tape to the GPS antenna.
3. Place the antenna on the dashboard. This solution is the most cost effective. Alternatively, the GPS antenna can be inserted into the A-Pillar or below the audio system. The end result is shown in the following picture:
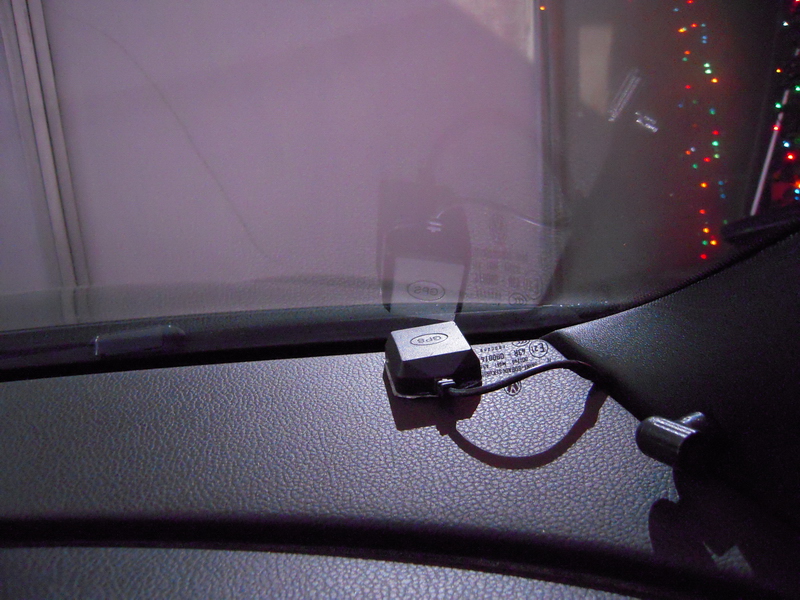
Receiving the satellites with the GPS antenna on the dashboard was quite satisfactory. However, you can install the factory GPS antenna in the car's trunk for perfect results.
The installation instructions go beyond the limits of this guide.
RNS 510 CODING
At first, you should connect your laptop to the ECU (Electronic Control Unit) of the car using vag-com cable. The key must be in the ignition and in ON position.
Then you should run vcds program. The very first time of running VCDS, be sure to go to "Options" menu and input a workshop code into the appropriate field or else the program won't let you make changes.
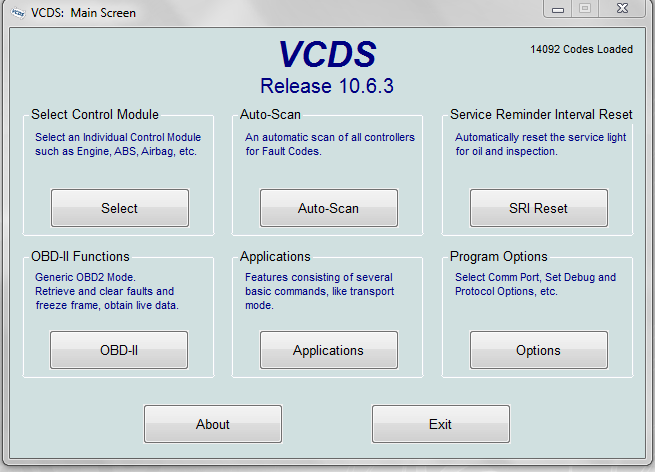
Select the "Control Module" option and afterwards select "37-Navigation".
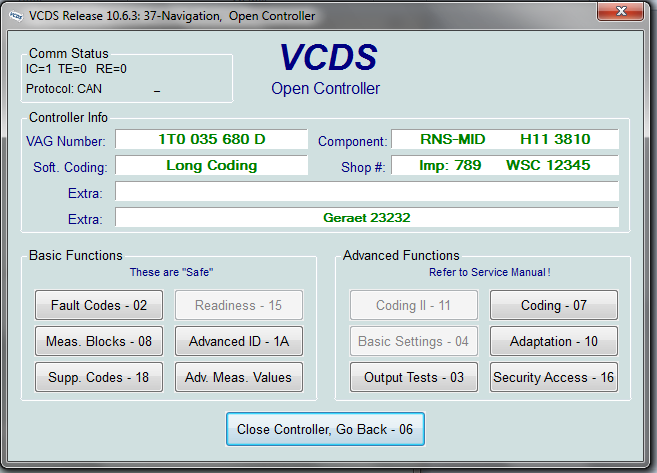
Press the "Coding - 07" button.

Afterwards select "Long Coding Helper".
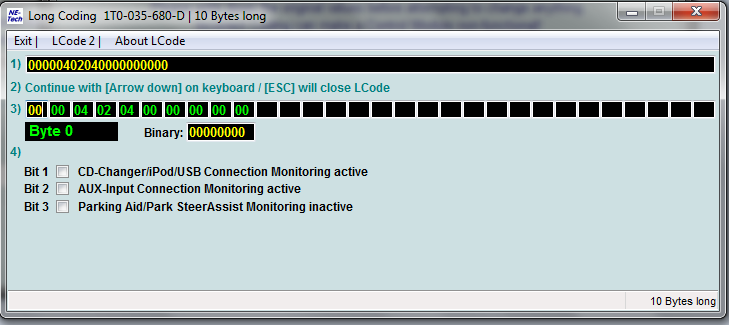
You choose nothing at the byte 0.
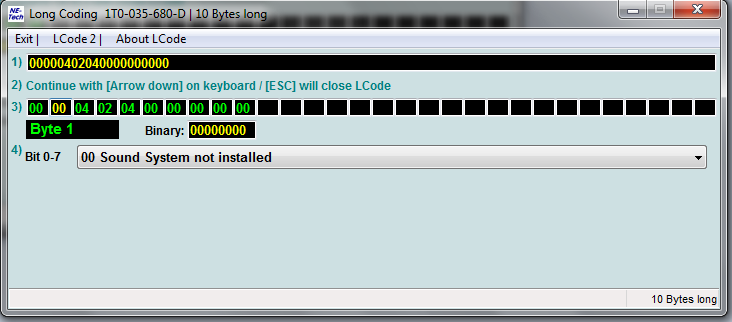
At the first byte you choose "Sound System not installed" from the list box unless you have an amplifier.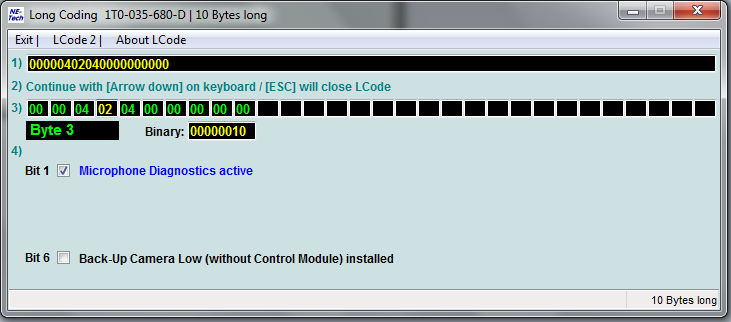
At the third byte you should check bit 1 "Microphone diagnostics active" if there is an installed microphone.
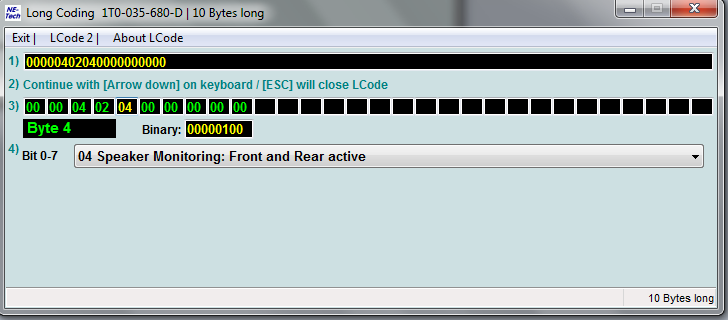
At byte 4 select "Speaker Monitoring: Front and Rear active".
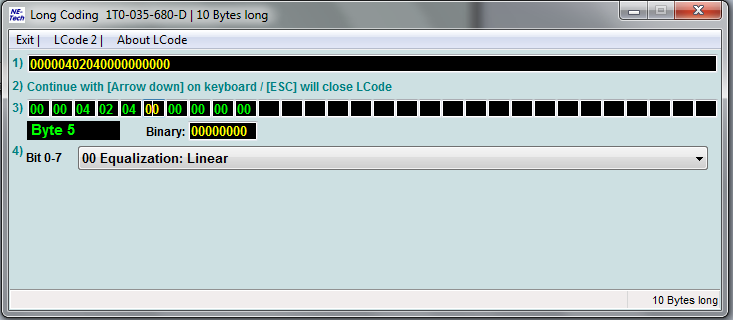
At byte 5 select "Equalization: Linear".
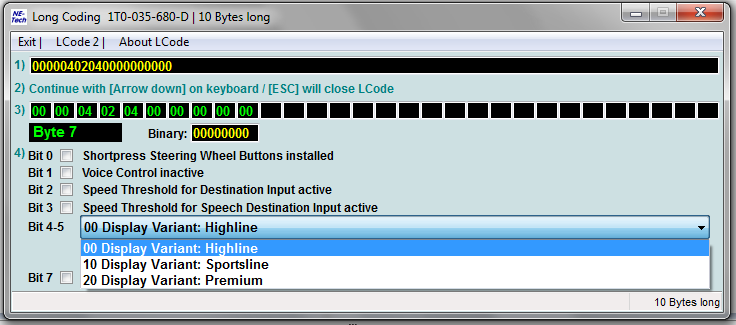
At byte 7, uncheck bit 1 if you an installed microphone.
The bits 4-5 of byte 7 are responsible for the skin of RNS-510.
The bit 7 of byte 7 (BAP) must be unchecked if the FIS display of the car is red.
Finally, click on "Exit" and then click on "Do it". The message "Coding is accepted" will pop up.