
")
Difficulty level: Quite High
Total Time Required: 6 Hours
Folding mirrors are part of the Lights & Sights package as an extra choice when buying a new VAG Group car.
These mirrors have a joystick function and a light at the bottom for perimeter illumination. The driver's mirror is anti-glare and the passenger's mirror has a reversing function.
In this guide, an effort is made to analyze the installation of tilting mirrors and door-lights in a Volkswagen EOS car.


A popup will display, which you can close and then you will be able to read the article.
YOU MUST DISABLE IT, IN ORDER TO BE ABLE TO READ THE REST OF THE ARTICLE.

Retrofit folding mirrors and illuminated reflectors
Step 1: Gathering the equipment
ESSENTIAL EQUIPMENT
- Lever with folding choice. Part Number: 1K0 959 565 J.


- Folding mirrors (driver and co-driver). Part Numbers: 1Q1 857 501 BB 01S και 1Q1 857 507.


- Controllers with windows motors (driver and co-driver) with production date 2008+ (optional). Part Numbers: 1Q0 959 701 F and 1Q0 959 702 F.


- Pair of illuminated reflectors. You can find them ready with the wiring. Part Number: 1K0 947 411 A.

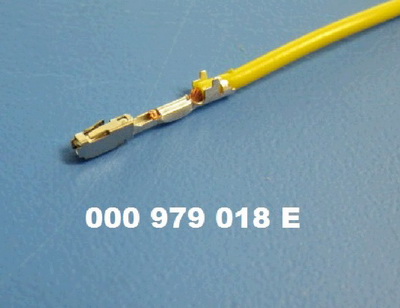
- 2 vw cables with part number 000 979 018.
- At least 2 plastic door clips. Part number: 6Q0 868 243.

The most economical - wise solution is to buy the ebay package for the reclining mirrors in the form of a package, as the maximum price they sell is 500 € with the transport and for each component to get separately from the dealership you need at least 350 Euros for each (except the button of course).
ESSENTIAL TOOLS
- Cartridge with magnetic screwdriver and various types and sizes of accessories.

- Trim Removers

- Cutter.

- Tyre ups of various sizes.

- Soldering iron with solder (optional).
- Insulating Tape.
- Laptop having VCDS software pre-installed along with a special Vag-Com cable.
NOTICE
You must gather all the equipment - tools and read this DIY guide before you begin this project.
This DIY is specifically made for VW EOS cars. The equipment, cable harness and/or connections may be differect in your car.
We will not be held responsible for any damage which may happen to your car by following this guide.
Step 2: Coding
The coding should be done in the beginning, unless you change the motors.
Opening the VAG-COM program, go to the Select Control Module, select the Chassis and press the 42 Door Elect Driver for the wiring harness of the driver.

Select Coding - 07 and record the 7 - digit code that has hitherto been the car. Depending on the additions you make to the car, you need to add the appropriate values to the code you just recorded.

You must add the following values:
+0000002 = Ambient Mirror Illumination installed
+0000064 = Door Exit/Warning Light installed
+0004096 = Folding Mirrors installed (MY 2008+)
So you have: 16565 + 2 + 64 + 4096 = 0020727.
Press the button “Do it!” and then ΟΚ.
Close the window by pressing Go Back 06.
Now you have to do the same procedure for the passenger's door. Go to the Select Control Module, select Chassis and press 52 Door Elect - Pass. So: 16820 + 2 + 64 + 4096 = 0020982.

Then, if you did not have a passenger mirror that was in reverse mode, you must also activate this option. The mirror is sinking if you put it back and you have the mirror button turned to R.
Go to 09 – Central Electronics, check Byte 14 and uncheck the Bit 7 - Mirror Lowering with Reverse Rear.


Step 3: Disassembling the door panel
Drag the window down and put the key to position 0 or remove it from the starter.
The wallpaper frame is held by 4 clips and 6 screws.
We start with the doorbell. On top of it, there is a plastic clasp.
With a knife, remove and unscrew the screw that is hidden beneath.


Continue with the plastic piece of the controls. We use one of the plastic removal tools and place it as in the photo.
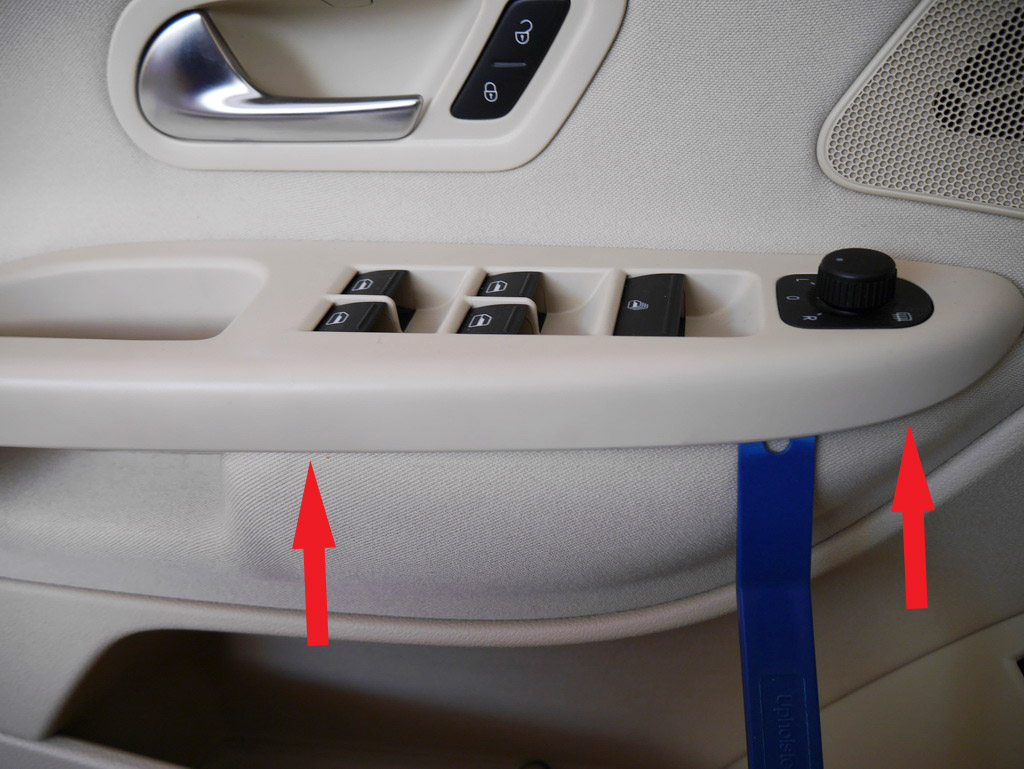
We lift the plastic piece with the buttons carefully upwards, as indicated by the arrows.
Unhook the cable connectors, remove the plastic piece, and replace the mirror control lever with the one for tilting.


Then unscrew the two screws located behind.

The last 3 screws are located at the bottom of the wallpaper frame.
There are 2 back and 1 front. Unscrew them with Torx size 20.


Then we have to remove the 4 clips, which are in the positions shown in the picture.

With one of the plastic tools you make a lever to open the wallpaper a little and with a thin straight screwdriver unclip the clip on the top left.
To do this, put the screwdriver's nose at the point of each clip's notch and push it toward you. The point of the notch is where the arrow of the photo shows.

In the following photos you see the difference between the clipped and the unclipped clips respectively. The teeth on the clip are outward in the shape of a "caliper".

It will sound a distinctive sound unlocking, and at that point you will be able to pull out the wallpaper easily with the clip on the piece of upholstery and not on the iron part of the door.
If the clip stays on the door, preventing the wallpaper from detaching, it means that it has not kicked or pinched.
The bottom left clip was locked in our case, so we had to take it out violently and hence need to be replaced.
Finally, for the 2 front clips, you can simply pull the wallpaper to your side and snap out.
You will notice now that the wallpaper is divided into 2 parts, in 1 small piece of plastic that comes next to the base of the glass and the other part is the largest.
Lift upwards, unhook the cable wires and unhook the hook from the door trim.
The photo appears to have come out of the big part of the wallpaper while the small part is still on the bottom of the door.

Put down the panel.
Step 4: Replacing the driver's mirror
If the outer plastic mirror cap does not have the same color as your mirror, you can easily replace the lids. Caps have a code of 3C8 857 537 C9X, with the last three digits indicating color - in this case black-pearl.

Place a straight plastic tool on the right of the mirror, just above the flash. Slide the lever towards you, turn the tool to the left, and then pull the lid out.

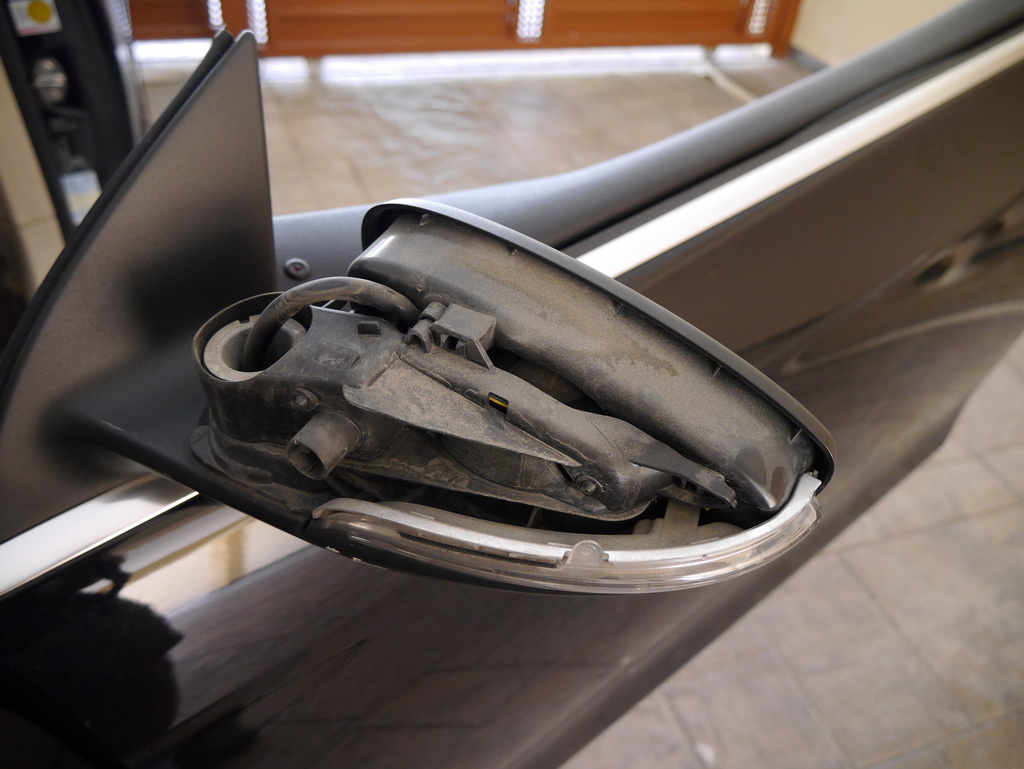
To remove the mirrors, the tweeter must come out. Here enough attention is needed because the plastic plugs of the tweeter are easily broken and the tweeter as a spare costs 60 euros.
The tweeter snaps into the inner mirror socket with 3 elastics, two of which are removed.
Use a plastic tool as a lever to slowly unclip the plastic sockets. Start over and with the tool that has the notch in the middle, push the top of the plastic piece out.


For the bottom, use a screwdriver or plastic tool as a lever.

Once the tweeter comes out, remove the 2 rubber straps from its plastic sockets, because to lock it later you must first place it in the mirror sockets and then snap the tweeter over it.

Now you see 2 screws holding the mirror. Thoroughly unscrew the plastic liner until the third screw pops up and unscrew using a magnetic screwdriver. Be careful not to drop a screw into the door.

Unclip the mirror connector from the door guide. To do this, pull out the red small piece of plastic, push the black clip and pull it out. Remove the mirror with its wiring.

Now place the tilting mirror, screw it in and connect the cable to the door guide by doing the reverse procedure described above.
Step 5: Check the door controller and replace if necessary
Before doing anything else, you should check whether the driver of the driver and front passenger can open the corresponding mirror.
The controllers which were built since 2008 are almost certainly reluctant because they also receive the corresponding encoding via VAG-COM (+4096). In the photo you see a 2008 driver's door guide next to a year 2007.

Having connected the new driver's mirror and encoding the door driver's bracket, you accidentally plug the cable lead to the lever by selecting the tilt. Turn the starter switch and place the lever in the upper left position. If the mirror opens, then your drivers do not need to be replaced.
In the event that something does not happen, it may be necessary to replace the door driver.
Remove all the connectors from the driver, unscrew the 3 screws that secure it to the door and insert the new door guide. To get the rectangular gray plug with the pink clip, refer to step 5.
The new driver must then be tuned. This process is necessary because otherwise the window will not go up correctly or not at all.
Connect the connectors to the new driver without screwing it though. Quickly connect the connectors to the window switches, turn the starter and keeping the driver not touching the door, press the switch to lower the window down completely for 3-4 seconds.
Now connect the computer to the car's brain and re-encode the driver according to step 1.
Finally, check if the tiller switch works and screw the guide in place.
Step 6: Retrofit illuminated reflectors (optional)
Focus on the gray rectangular plug with the pink clip. Press the small tab to release the pink clip and pull it upwards. Pull out the plug and cut the bundle that holds the wire harness.


Behind the pins are hidden, where 2 of them will be used to provide current to the reflector lamp. The row has to pull out the white plug, pulling the fuse to the right and lifting the remaining piece.

We take one of VW's cables and cut it in the middle. Then connect each cable of the illuminated reflector to each end of the cable we cut. We use insulating tape and / or adhesive for joints.
Our goal now is to find out which terminals the two reflector cables must connect.
In our car and the driver's door, the terminal of the 1st and 3rd lines was on the ground, while the 1st and 2nd lines related to the current.
You can try to see if they are the same terminals in your own case by putting the red cable on the power terminal and the black on the ground.
If it does not light up, then we follow the following procedure.
The red reflector cable is plugged into the socket that ends in the red-yellow cable and continues to carry power. The black cable is touched on each of the terminals until the reflector lamp illuminates. This is about grounding and we note the position of the terminal when we find it.

You will notice that it may unlock the trunk or open the gasoline cap, which is normal.
Then, keeping the black cable in place of the lead we found, test the red cable on one of the other terminals until the reflector lights up.
Place the corresponding wires in the corresponding positions of the white part and place it in the gray rectangular plug.
Pull the cables with an insulator, put a new bundle and plug the plug back into the driver's seat. If everything has been done properly, the reflector will light up.
What is left, is to to unbutt the old reflector from the wallpaper and lock the illuminated reflector.
Step 7: Assembling the panel
Make sure the wallpaper clips are unbuckled and in good condition. Replace what has been broken or worn.
The tweeter must be in place and also the 3 connectors ending in the door guide.
Connect the cable connectors, the door knob hook and put the small plastic part of the upholstery to the point where it was originally.
Place the wallpaper back in place with care to snap the plastic clips.
Step 8: Wiring harness for anti-glare operation
In the "Lights & Sights" project, we had 2 cables waiting for the anti-glare function of the driver's mirror.
Open the driver's door at the end, push the top of the rubber bladder to reveal the wiring harness.
We unclip it and drive the cables we had left in the following positions: the yellow in the purple-black position and the yellow-green in the purple-brown position.
We check that the driver's mirror "tans" when the "central" mirror is blacked out by placing our hand behind the central mirror with the engine open.
Step 9: Co-driver door
The procedure for the passenger's door is similar to that of the driver.
We take a plastic tool and place it as below. We pull out to undo the plastic piece.

Insert the tool a little higher with care so as not to destroy the underlying bases and pull it out again until all the plastic piece comes out.

Then unscrew the 2 screws that are hidden from behind with the 30 Torx.


Follow- ing steps 2-6 completes the procedure for the passenger's door.
Final Check
Turning the lever into the folding position, the mirrors close, while turning it to any other position they open.
The lever must be in the R position to operate the mirror "sinking" on the passenger side during reverse.
By unlocking the car or opening the doors, the lights under the mirrors must illuminate. Also opening the doors should always be lit by the corresponding reflector.
References
http://vweos.gr/2012-07-17-19-27-32/2012-07-17-19-32-35/185-del
http://www.sciroccocentral.co.uk/forum/viewtopic.php?t=14719&p=126204